Canning Beans
In our family canning beans became important early in our lives. Although all types of beans can be canned, most of us never canned dried beans. Canning green beans was a major part of the summer’s canning. Dad and Mom never felt we could spare the time for canning dried beans. Dried beans have such a long storage life and canning is really only for convenience. Back when I was young, we never thought about having “convenience foods”. However, today many are so busy that these canned beans come in handy. They are much faster than the slow cooking process which they demand when dried.
The process of canning beans was taught to all of us by Mom because they provide an essential part of our diet during the winter months. I prepare canned green beans as a side dish and add them to many recipes on a regular basis. I do keep some cans of dried beans in my pantry as a convenience, as I said. All types of canned beans can be added to casseroles, soups and even chili is good with the dried variety of beans and green beans. I know a woman who told me she carried a can of green beans with her every day. She was dieting and always purchased a bowl of chili for lunch. She added the green beans to extend her chili and have fewer calories than anything else she could eat. It worked!
Within the two types of beans, fresh green and dried, there are many types in each. If you are canning beans you will find it can be done with dried ones like kidney, navy, pinto, black, Lima, butter beans or many others. All of these can be canned under pressure. Dried beans have been a staple in American cooking. What some think as poor peasant food, others value them highly for being economical and for their added protein and fiber in the diet. If by canning dried beans makes it more convenient for you to use, by all means can them.
FOR CANNING DRIED BEANS rinse and sort the beans. Cover the beans with cold water and let them stand overnight in a cool place. Rinse the beans again, cover with fresh water and bring to a boil; boil for 30 minutes. Pack the beans in hot sterilized canning jars leaving 1 inch headspace. Add 1 teaspoon salt to each quart jar. Fill the jars with boiling water leaving 1 inch headspace. Adjust lids and process under 10 pounds of pressure for 30 minutes.
For most of us, the fresh or green ones are the most common for canning beans during the summer. Ones such as Lima, butter or soy beans will need to be shelled before canning. Others like a variety of green beans, wax beans or string beans are canned with the pod on. These need to have the ends trimmed off and broken in smaller pieces (Unless you plan to can them whole). All of these can be canned under pressure with the hot pack or cold pack methods.
CANNING BEANS (Fresh green, snap, string or wax beans)
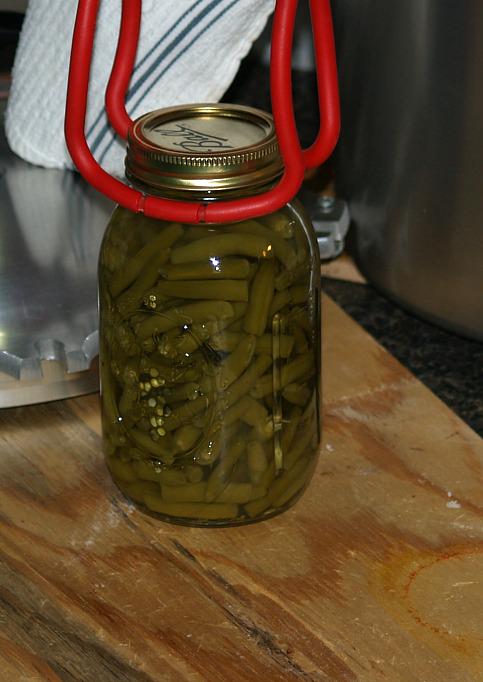
For HOT PACK canning beans, wash, drain, string, trim ends and break fresh picked beans into 2 inch pieces if desired.
Cover beans with boiling water and boil for 3 minutes.
Pack hot beans in hot quart jars; cover with boiling water from beans leaving 1 inch at top.
Wipe jar rims clean and adjust lids and rings; process quarts in pressure canner 25 minutes at 10 pounds of pressure.
For COLD PACK OR RAW PACK canning beans, as with the hot pack, wash, drain, string, trim ends and break into 2 inch pieces fresh picked beans.
Pack lightly in clean hot jars leaving 1 inch head space.
Add 1 teaspoon salt to each quart jar and fill will hot boiling water leaving 1 inch headspace.
Adjust caps and process quarts in pressure cooker for 25 minutes at 10 pounds of pressure.
CANNING BEANS (Fresh Lima or butter beans)
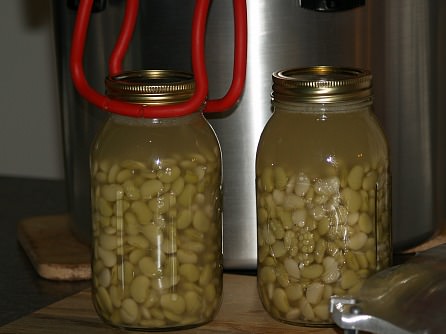
To HOT PACK Lima or butter beans wash, drain and shell tender young beans.
Wash again, cover with water and boil 3 minutes.
Pack hot beans into hot sterilized jars leaving 1 inch head space.
Add 1 teaspoon salt to each quart jar and cover with boiling water leaving 1 inch head space.
Adjust caps and process quarts in pressure canner for 50 minutes at 10 pounds of pressure.
NOTE: If leaving beans whole and they are larger beans process for an additional 10 minutes.
For COLD PACK or RAW PACK beans wash, drain and shell tender young beans.
Wash again and pack loosely in hot quart jars leaving 1 inch head space; do not shake or press down.
Add 1 teaspoon salt to each quart; cover with boiling water leaving 1 inch head space.
Adjust caps and process in pressure canner 50 minutes at 10 pounds of pressure.
NOTE: Vegetables should be canned under pressure. The exception to this is when they are pickled using a lot of vinegar. The vinegar makes the vegetables become acidic.
DILLY BEANS RECIPE
This is a flavorful recipe for canning beans.
- 2 Cups vinegar
- 6 Cups water
- 3 Teaspoons salt
- 2 Cloves sliced garlic
- ¼ Teaspoon red pepper
- 1 Head fresh dill
- 1 gallon whole green beans
Wash and string tender young beans.
Scald beans in boiling hot water until beans are tender enough to stick with toothpick (about 10 minutes).
Pack beans into 6 hot sterilized pint jars.
Combine vinegar, water, salt, garlic, red pepper and dill in a kettle and bring to a boil.
Pour vinegar mixture over beans in jars leaving ½ inch headspace at top.
Boil lids in hot water and adjust on jars to seal.
PICKLED CANNING BEANS RECIPE
- Select tender fresh green beans, string, break beans, wash thoroughly when canning beans; cook just until tender.
- Rinse beans in cold water and drain well.
- Sprinkle ½ cup salt in the bottom of a 5 gallon crock; layer a gallon of green beans.
- Sprinkle another ½ cup salt over the green beans; layer another gallon on green beans.
- Continue making these layers for as many green beans as you want to pickle.
- Pour cold water into the crock to cover all the beans; cover beans with a plate and weigh it down with rock or something heavy to keep beans under water.
- Keep crock at room temperature; in about a week a brine will form.
- At this time take the skim off the top of the water.
- When the green beans taste sour, take them out of the crock, pour off the brine and cover with fresh water.
NOTE:
If beans do not sour and form a brine in the crock after a week, cook 3
to 4 ears of corn, cut it off the cob and mix with the beans. The corn
will make the beans ferment. It can be left with the beans, canned with
the beans and eaten with the beans.
- Bring the beans to a boil and let them boil for 5 minutes.
- Fill hot sterilized quart jars with the beans and boiling water to cover; seal jars with hot lids.
- To serve remove beans from jars, rinse in cold water and place drained beans in a skillet with hot bacon grease.
- Heat thoroughly and serve.
SWEET AND SOUR GREEN BEANS
- 1 ½ Gallons green beans washed and snapped
- 1 Cup sugar
- ½ Cup vinegar
- Salt
Cover beans with water in a large kettle; add sugar and vinegar and bring to a boil.
Boil beans 40 minutes; pack beans in hot sterilized canning jars adding 1 teaspoon of salt to each jar.
Seal jars tightly with hot lids; NO NEED to process.
When ready to serve drain off liquid, season and cook as desired.
SPICY PICKLED BEANS RECIPE
- Fresh green beans
- 1 Quart white vinegar
- ½ Cup water
- ¼ Cup pickling salt
- 1 Teaspoon dill seed per jar
- 1 Hot red pepper per jar
- 1 Hot green pepper per jar
- 2 Cloves garlic per jar
Place ½ teaspoon dill seed in bottom of each sterilized pint jar.
Wash green beans and pack as tightly as possible in jars being careful not to bruise beans.
Add ½ teaspoon dill seed, the peppers and garlic to each jar.
Combine vinegar, water and salt and bring to a boil; pour boiling hot over the green beans.
Adjust lids and rings on jars and process in hot water bath at simmering temperature for 15 minutes.
Store for 6 weeks before using; serve cold. Makes 4 pints.
PORK AND BEAN SOUP RECIPE
- 1 Pound dry beans (pinto, navy, great northern)
- ½ Pound bacon in pieces
- 3 Cups chopped onion
- 1 Cup diced carrots
- 2 Cups chopped celery
- 2 Quarts water
- 2 ½ Cups tomato juice
- 1 Tablespoon salt
- 1 Teaspoon black pepper
- 1 Bay leaf
Soak beans overnight; cook until soft.
Fry bacon and add to beans; cook onions in bacon fat until tender and add to beans.
Bring to a boil and simmer for 1 hour.
Put in jars with lids and pressure can for 40 minutes at 10 pounds of pressure.
PICKLED DILLED BEANS
- 2 Pounds fresh beans (green, yellow or mix)
- 4 Heads fresh dill
- 4 Cloves garlic
- ¼ Cup canning salt
- 2 Cups vinegar
- 2 Cups water
Wash and trim ends off beans.
In 4 pint jars place 1 head of dill and 1 garlic clove.
Pack whole beans neatly in jars TRIMMING to fit if necessary.
Combine salt, vinegar and water in a saucepan; bring to a boil.
Pour the liquid over the beans leaving ½ inch headspace; adjust lids.
Process jars in boiling water bath for 5 minutes.
ADZUKI BEAN JAM RECIPE
Learn how to can beans with adzuki beans. These are tiny red Chinese beans for jam used as a filling for steamed buns.
- 1 Pound dried adzuki beans (or red kidney or navy beans)
- 2 Teaspoon salt
- 2 Cups sugar
Cover beans with water in a heavy pan; cook until soft.
Drain beans and press through a sieve; place pulp in a cheesecloth and press out remaining liquid.
Return pulp to the pan and add salt; over low heat gradually stir in the sugar.
Continue cooking and stirring until you have a smooth stiff mixture.
Fill pint jars leaving ½ inch headspace; adjust lids.
Process under 10 pound pressure for 20 minutes; makes 2 ½ pints.


