- Painless Cooking
- Holidays
- Christmas Candy Land
How to Make Christmas Candy Ideas
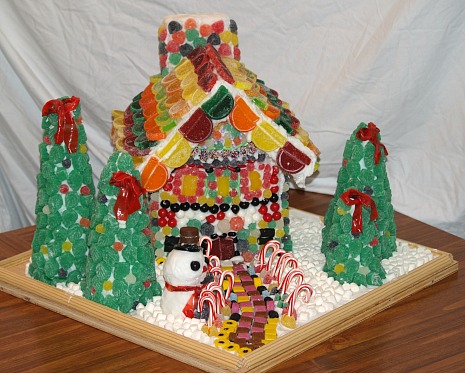
Each year I learn how to make Christmas candy ideas to share with you. Many years ago I came across a picture of a Christmas candy scene that stuck in my mind ever since I saw it. Each year since then I had planned to try making one like it but I knew it would take a lot of candy. This is not a cheap project!
I learned how to make Christmas candy ideas from the Brach candy company; this is one of them if I remember correctly. Of course, they have all the candy at their disposal to make any kind of scene they want but I do appreciate them sharing their ideas. As you can see, this one made a lasting imprint on my brain.
This past October I decided this would be one of my Christmas candy ideas for this year. I hope you enjoy sharing it with me. I decided after taking pictures of it, I would give it away to some type of charity where children could also enjoy our project.
The first thing I had to do was to locate a source for all the candy. I knew it would take a lot of “stuff” but I had no plans or idea of how much I would need. In years past when I looked for candy for this Christmas scene, I could not find enough and it seemed very hard to order without knowing where to begin. This year I was determined.
When I learned how to make several of my Christmas candy ideas I found a source called Nuts.com to buy jellied candies. I placed an order for thirty pound of green spearmint leaves which I used on all the candy land trees and around the bottom of Christmas house to look like little bushes.
I added to the order one pound each of various colored and flavors of the jellied fruit slices to use as shingles on the Candyland house. I then added five pounds of the large jellied gumdrops and the small spice gumdrops to the order. After pushing the “send button”, I realized I had to “get on the ball” and gather in the rest of the “stuff” to make this project. The candy would be here in a few days and this was among my largest Christmas candy ideas to date.
At Sam’s I found some very small candy canes to use along the walkway. A stop over at Fresh Market brought me a large licorice disk for the snowman’s hat brim and some small disks of chocolate candy for the top of his hat. I also picked up some other little licorice pieces; one for his pipe and a few “just in case” pieces. At one of my favorite little stores, Mountain View, I was able to pick up some colorful squares of licorice to use on the walkway. Guess what, I could have bought all that bulk candy here also but I never saw it before.
After quite a few days, I still had not received the bulk of my candy. I got a phone call from Florida; my candy order was sent to me there and I was up in the mountains. To shorten my story, I finally received my candy about a week to two later putting me really behind in my schedule.
I needed something sturdy to make the candy land scene on. With the weight of all this candy I thought heavy plywood would be the answer. Lowes had a nice finished ¾ inch plywood already cut in a 24 inch square. This is great leaving me no leftover wood to store from cutting a large sheet.
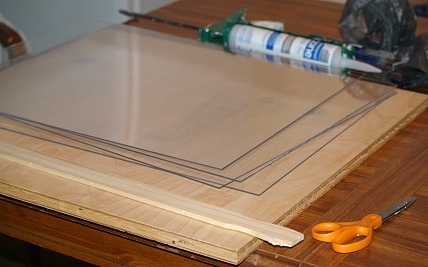 Christmas Candyland Supplies
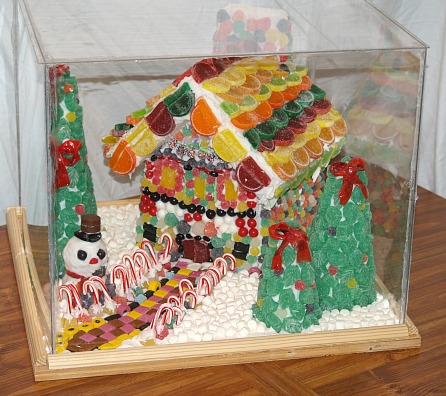
This is one of the Christmas candy ideas which I felt it necessary to make a cover “or dome” to keep it clean and fresh. Plexiglas would allow everyone to view the scene but would also keep it clean. I bought four pieces for the sides but I would have to cut it myself because I wanted the sides to be 22 inches so it would set on the board. I was assured it was easy to cut but it is NOT that EASY. I managed the four sides but I totally busted the roof. That was about $25.oo down the drain. I had Lowes to cut the last piece.
LESSON LEARNED: Always have the store do the cutting.
I bought 2 inch thick Styrofoam to make the house (my measurements at the bottom), Styrofoam balls for the snowman and Styrofoam cones of various sizes for all the trees. After cutting the house, I used Styrofoam glue to put it together; hot glue will melt the Styrofoam. I also used scotch tape to make a belt around the house for sturdiness. After gluing everything to the wood, I was ready to begin.
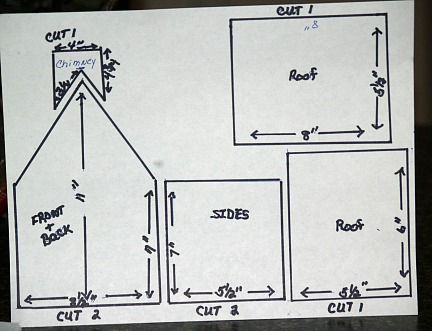 Diagram Candy House
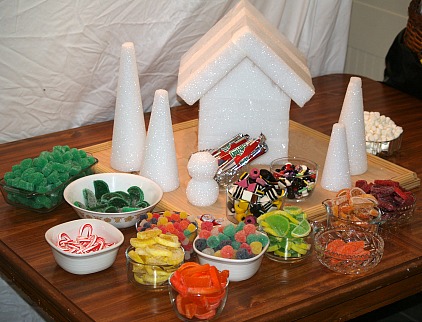 Prepping Christmas Candyland Supplies
I remember in the original picture which I saw this scene, all the candy was stuck on with toothpicks. I decided to use royal icing for the glue. It takes a lot; I think I used about eight to ten pounds of powdered sugar.
This was one of my more time consuming Christmas candy ideas. Kelly (my daughter) and I spent the whole day sticking candy. It was time to cover it with the Plexiglas dome which we made the previous day. (We cleaned it very early so it would air dry completely before placing it.)
What a tight fit! The candy pieces were much thicker than what I was thinking making it very snug with the cover on. We knocked off a couple pieces of the candy so we removed the cover to fix the candy. After adding more icing to stick them on I inserted a toothpick to hold until they dried. I was not about to take the cover off again. If anymore fell they would have to stay where they fell and they did.
LESSONS LEARNED: If I ever made another one of these Christmas candy ideas (AND I NEVER PLAN TO), I would allow more space for the cover to fit.
FINAL ESTIMATED MATERIALS: (I roughly estimate my cost in materials to be about $300)
- 15 Pounds of green spearmint leaves
- 2 ½ Pounds Large jellied gumdrops
- 2 ½ Pounds small jellied spice gumdrops
- 6-7 Pounds jellied citrus slices
- 20 Small peppermint candy canes
- 2-3 Pounds decorated licorice squares
- 1 Pound fancy licorices pieces
- 1 Large licorice disk
- 2 Chocolate disks
- ¼ Pound small licorice pieces
- 1 Box red fruit roll ups
- 4 Styrofoam cones various sizes
- Flat 2 inch thick Styrofoam sheets
- 2 Styrofoam balls
- 8-10 Pounds powdered sugar
- 2 Bags miniature marshmallows
WILTON’S ROYAL ICING RECIPE is perfect for this Christmas candy idea
This is what I used and can be used for many Christmas candy ideas when edible glue is needed. I made two batches at a time. I mixed it until spreadable and I only applied it to one object at a time; for instance one tree at a time. When I started on the house, I did one wall at a time.
- 4 Cups sifted powdered sugar
- 3 Tablespoons meringue powder
- 5-6 Tablespoons warm water
NOTES FOR DIAGRAM:
This is how I made mine using a 2 inch thick Styrofoam. The pieces may change using thinner Styrofoam or you may wish to change the size you make. This is only to give you a little direction.
FOR THE CANDYLAND HOUSE:
Cut 2 for the front and back of house 8 ½ inches wide across house up to gables and 7 inches from bottom to gables. IN THE CENTER from the bottom to the peak of the roof it should be 11 inches.
Cut 2 for the sides 5 ½ inches wide and 7 inches tall.
ROOF: If using 2 inch Styrofoam cut 1 piece 6 inches by 5 ½ inches. To “but” the other side to the roof, I cut 1 piece 8 (to allow for the 2 inch Styrofoam) inches by 5 ½ inches.
LESSON LEARNED: It looks best if both sides of the house and the roof are done in the same pattern.
