- Painless Cooking
- Holidays
- Homemade Christmas Food Gifts
How to Make Homemade Christmas Gift Food
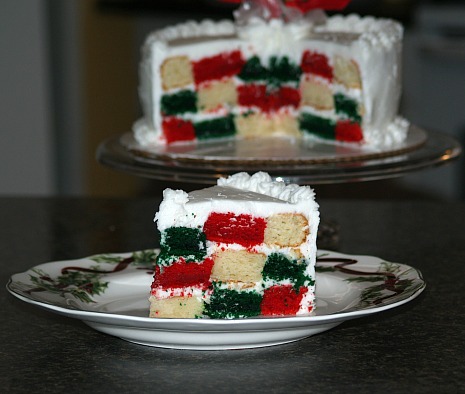
Learn how to make homemade Christmas gift food. Every year I think about making a checkerboard cake. My thoughts were about making one using the traditional Christmas colors of red and green. Each year I have so many other recipes to make for the holidays that a checkerboard cake has had to take “the back seat”.
This year I decided to put a checkerboard cake close to the top of my priority list simply to see how it turned out using red and green instead of the normal chocolate and vanilla cakes. Have you ever made a checkerboard cake? Now, there is a pan being sold (I know one is by Wilton’s) to make one of these but actually it is quite simple to make one with the typical cake baking pans.
As I learned how to make homemade Christmas gift food, my red, green and white cake turned out beautiful. My neighbors really loved it, even though it was early; a bit before Thanksgiving. It really had a great flavor so it really doesn’t matter if they ate it before Christmas.
Learning how to make a homemade Christmas gift food has led me to choosing the following recipe. It has a delicious moist texture and is firm enough to hold together while cutting and arranging the circles. I would not recommend a “box cake mix” for this. They are too light and probably would crumble as you arrange the checks.
HOW TO MAKE HOMEMADE CHRISTMAS GIFT FOOD like BASIC WHITE CAKE RECIPE
- 7 Large egg whites
- 2 ¾ Cups sifted cake flour
- 3 ½ Teaspoons baking powder
- ½ Teaspoon salt
- 1 ½ Cups granulated sugar divided
- ¾ Cup softened butter
- 1 Teaspoon vanilla
- ½ Teaspoon almond extract
- 1 Cup plus 2 tablespoons milk
- 1 Ounce red food coloring (liquid)
- 1 Ounce green food coloring (liquid)
Separate whites from yolks while cold; let whites warm to room temperature.
Refrigerate yolks to use in another recipe; I use in homemade noodles.
Preheat oven to 350F degrees.
Grease three 8 inch round cake pans; line with wax paper then grease and flour lightly.
Sift flour with baking powder and salt; set aside.
Cream in a large mixing bowl the butter and 1 cup of the sugar; beat in vanilla and almond until fluffy.
On low speed beat in flour alternating with 1 cup of milk.
Divide batter evenly among three separate bowls (I wanted it pretty exact, so I measured; it was under 2 cups per bowl)
Add 1 ounce of green coloring to one bowl; 1 ounce red to another bowl; add 2 tablespoons milk to the white batter.
Stir each of these bowls until thoroughly blended.
NOTE: USE CLEAN UTENSILS FOR STIRRING EACH OF THESE BOWLS. ALSO, AFTER THEY BAKE, MAKE SURE YOU USE CLEAN KNIVES FOR THE CUTTING. YOU WANT TO KEEP EVERYTHING AS NEAT AS POSSIBLE.
At high speed beat egg whites until foamy; very gradually add ½ cup of the sugar.
Continue beating until stiff peaks form; divide EVENLY among the three different batters.
Fold the egg whites into the batters until blended; spoon batters into the three prepared pans.
Bake about 20 to 25 minutes or until pick comes out clean; remove from oven and cool 5 minutes.
Remove cakes from pans, peel off wax paper and cool completely.
MAKE A PATTERN:
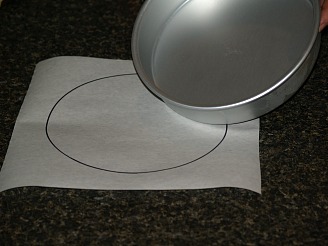
I used freezer paper to make a pattern; place cake pan on paper and draw around it making a circle.
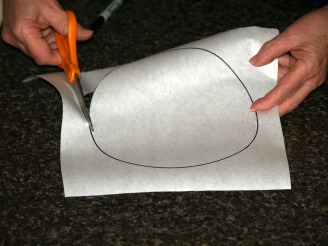
Using clean scissors, cut around the circle (it will be the size of your cake)
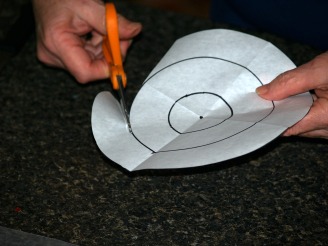
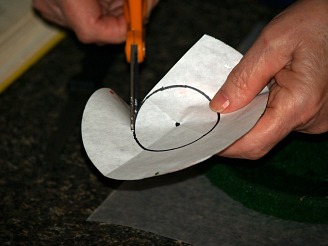
Fold the circle in half and then in half again (I find this useful to find the exact center); make a dot.
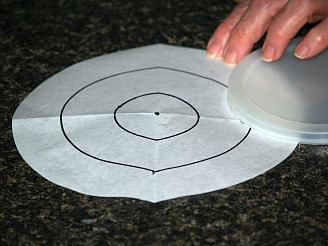
Unfold circle; make a circle in the center using the dot for reference (I used ¼ measuring cup to draw circle).
Make another larger circle to make a ring. I used a 5 inch lid to draw around
NOTE: All these circles can be made with a compass also.
 |
 |
 |
 |
Arranging this cake with the Christmas colors makes a very pretty homemade Christmas gift food.
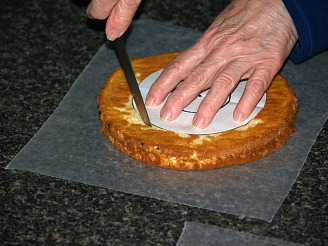
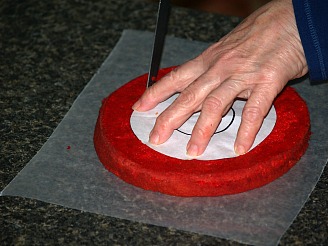
When
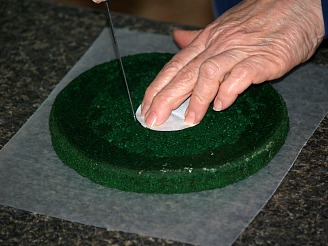
the cakes are cold cut the outer ring off the pattern and center it on
cake 1; with knife cut around the pattern; cut cake 2 around pattern
with clean knife; cut cake 3 with clean knife.
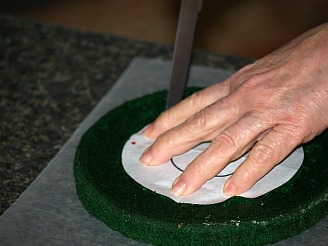
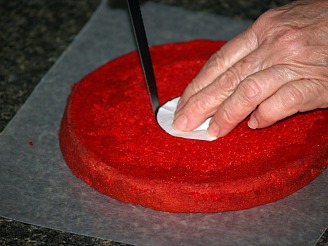
Cut the second ring
off the pattern and center it on cake 1; cut with clean knife around
patter; center on cake 2 and cut with clean knife; center on cake 3 and
cut with clean knife.
 |
 |
 |
 |
 |
 |
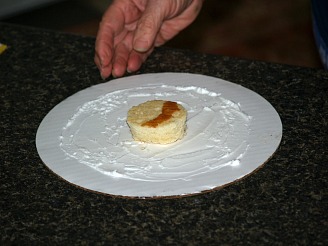
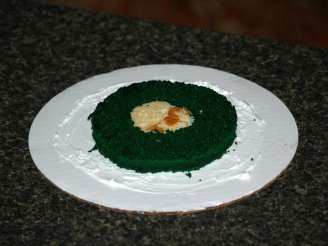
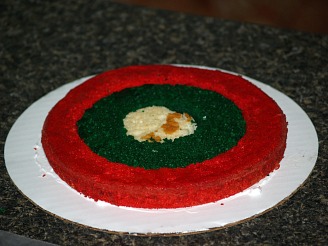
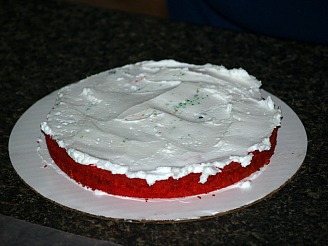
For Layer One:
Place the small white circle in the center of a cake plate.
Place the center ring of the green cake around the white circle.
Place the large red circle around the green ring.
Spread a layer of frosting over the white, green and red layer.
 |
 |
 |
 |
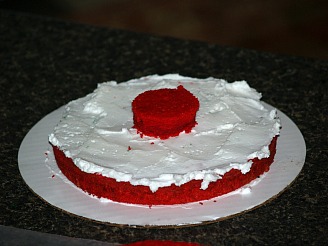
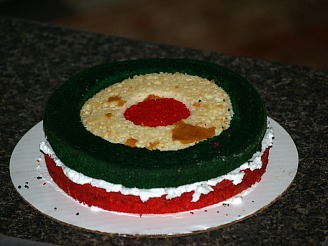
For Layer Two:
Place the small red circle in the center.
Place the center ring of the white cake around the red circle.
Place the large green ring around the white ring.
Frost the top of the layer
 |
 |
For Layer Three:
Place the small round green circle in the center.
Place the center ring of the red cake around the green.
Place the large white ring around the red ring.
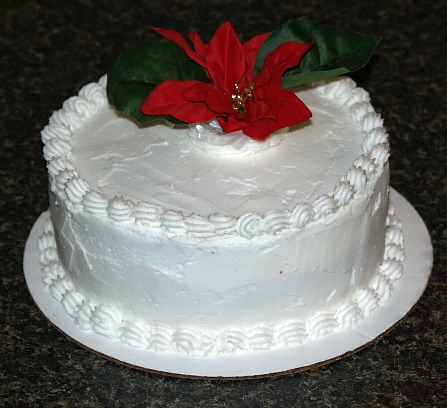
Frost top and sides of cake; decorate for the occasion.
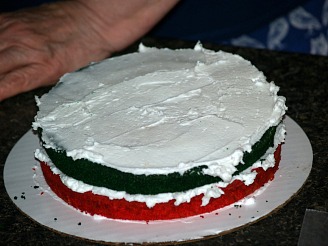 |
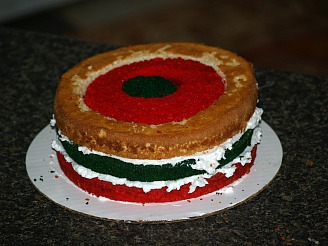 |
SPUMONI CAKE
Another homemade Christmas gift food which I like is the spumoni
cake. It reminds me of the delicious Italian Christmas cookies; named
spumoni cookies. Actually, Italy makes me think about Christmas. It
seems their favorite colors are “red and green”; only spumoni adds a
little yellow too.
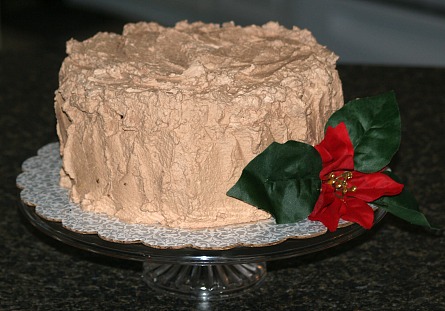
The spumoni cake I make is made with a delicious chocolate cake recipe. If you have a favorite, use that one but if not try an old fashion chocolate layer cake. The “spumoni part” comes in the finishing touches.
To
finish this deliciously flavored spumoni cake for a homemade Christmas
gift food, let the 2 baked layer cakes cool completely. Here is what you
will need:
- 2 Baked chocolate cake layers
- 4 Cups whipping cream
- ½ Cup sifted powdered sugar
- Few drops liquid green food coloring
- ½ Teaspoon vanilla
- ¼ Cup chopped pistachio nuts
- Few drops liquid red food coloring
- 1 Package (10 ounces) frozen strawberries, thawed and drained well
- Few drop yellow food coloring
- ½ Teaspoon rum flavoring
- 5 Tablespoons sifted unsweetened cocoa powder
- ½ Teaspoon cinnamon
How to Make the Spumoni Cake?
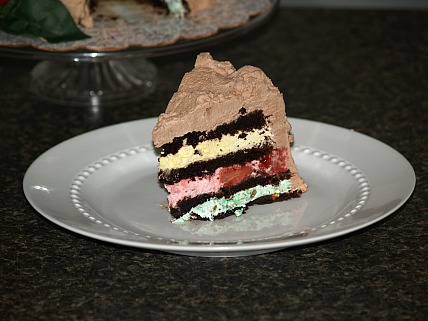
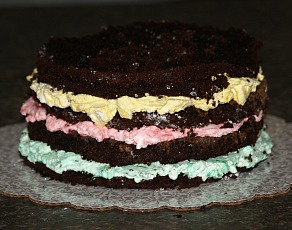
Split each layer of the cooled cakes in half so you have 4 thin layers.
Whip half of the whipping cream gradually adding half of the sugar until stiff peaks form.
Divide in three parts:
Part one: Add green coloring, vanilla and nuts; spread over layer one of cake and top with cake layer two.
Part two: Add red coloring, and strawberries; spread over cake and top with cake layer three.
Part three: Add yellow coloring and rum flavoring with remaining whipped cream; spread over cake.
Top with last cake layer.
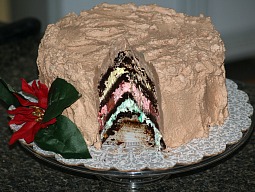
Whip remaining 2 cups of cream with ¼ cup of powdered sugar; add cocoa and cinnamon and frost entire cake and refrigerate.
 |
 |
Everyone always loves to receive homemade Christmas gift foods!
